
This article describes how to make a small device that allows you to use a small keyfob remote control to enter your computer password with one button press.
Notice I didn’t say Windows. That’s because this should work on just about anything that uses a USB keyboard. I know I can use it to enter the Bitlocker password before windows has started up and I’ve tried it successfully on a Chromebook. I don’t have my Mac anymore but If anything is going to fail it will be an Apple device.
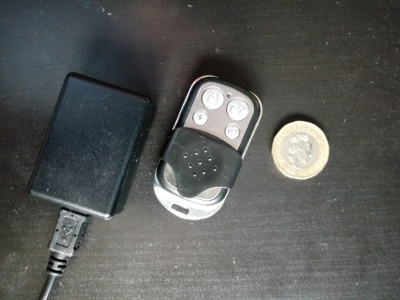
Here’s a picture of the keyfob, the receiver and a Pound Coin for scale.
Hardware
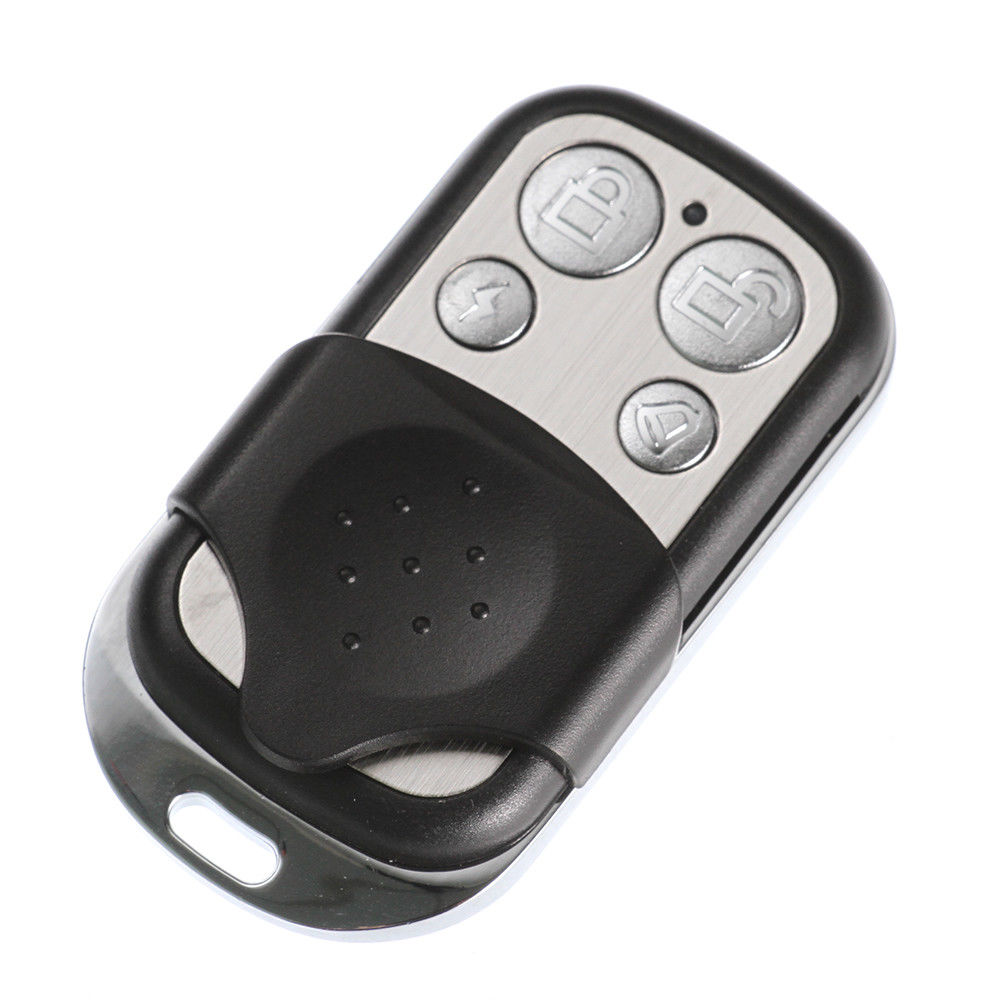
I already had the keyfob and have no idea where I got it, or for that matter why, but its ideal for this project. I know you can get these from eBay as I “borrowed” the picture above from there.
The device attached to the computer is built around an Arduino Pro Micro clone. Here’s the picture from the eBay listing.
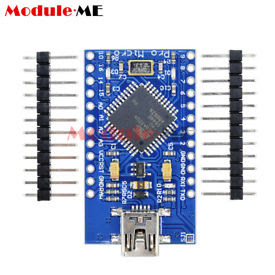
It’s based on the ATmega32U4 IC which has built in USB functionality and can imitate a HID (Human Interface Device) keyboard. I used the 16MHz 5V version as the radio receiver works on 5V. The USB port is USB mini, rather than the newer micro, but that’s not a problem as I had plenty of those leads lying around. I suspect anyone thinking of following this article does too. These modules cost a little over three pounds, fresh from china as usual.
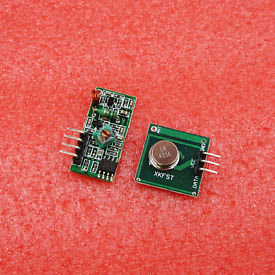
To receive the commands from the remote control I used another eBay purchase. It’s described as “2PCS 433Mhz RF transmitter and receiver link” and you get two transmitters and two receivers for 94p, including delivery. How is beyond me, surely the delivery alone is worth more than that. Here’s the eBay picture to see what you’re looking for.
The hardware fits snugly into a box, from eBay as usual, like this.
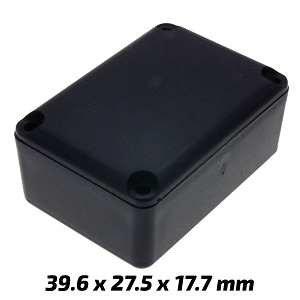
This actually came from a UK supplier so cost over 4 pounds, but I didn’t want to wait weeks for the Chinese postal service.
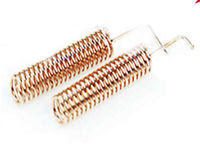
My original antenna was 19cm of wire roughly coiled up and shoved into the box. It gave me a range of about 6 inches, so I got back onto eBay and bought myself a couple of proper coiled 433MHz antennas. I used a UK supplier again for speed, but got these in 2 days.
Other than that I just needed three connecting wires from the Arduino board to the receiver. These connect the Vcc on the Arduino to Vcc on receiver. Likewise the Gnd. The data pin on the receiver (For some odd reason there are two that do exactly the same thing) is connected to the Arduino pin marked 15. Which is one of the Arduino General Purpose Input Output (GPIO) pins. Three wires turned out to be stiff enough to hold the receiver in place too. The whole thing stacked up like this
.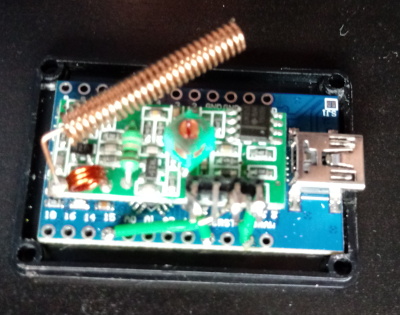
The blue PCB is the Arduino board, the green one is the 433MHz receiver with the coil antenna attached.
The whole thing is powered from the USB, and the computer believes it has another keyboard plugged in. It also sees a USB serial port, but you can ignore that.
Software
This old page of mine describes how to get the codes from a 433 MHz transmitter. I now have an oscilloscope so this was a bit easier for me, but the audacity method works fine. Closer examination and a bit more reading on my part showed the codes to be 24 bits of data made up of a 20 bit ID and 4 bits of data. Once transcribed to binary they can easily be converted to Hex for use in the code.
The code was written using the Arduino IDE downloaded from here. To work with the Arduino Pro Mini clone, set the board to Arduino Leonardo in the IDE menu.
The code runs once every approximately 100 microseconds thanks to the delay at the end of the loop function. It uses a state machine to read the data from the remote control receiver on Pin 15. When 24 bits have been read, it calls a routine to decide whether they are a known code. If so, it calls another routine to transmit the key presses to the computer.
Here’s the listing with my codes and passwords changed.
// Bring in the keyboard library.
#include <Keyboard.h>

// Definitions of input pin and state machine values
#define RCPin 15
enum state
{
  preambleHi,
  preambleLo,
  subHi,
  subLo
};

// Data buffer and pointers in it.
byte data[3];
byte bitmask;
byte byteIndex;

// Count of how many cycles we've been in a state.
byte count;

// Storage for the current state.
state RCState;

// Initialize everything.
void setup()
{
  setState (preambleLo); // Convenient way to initialize data buffer and state machine.
  pinMode(RCPin, INPUT); // Input from the 433MHz receiver.

  Keyboard.begin(); // Initialize the keyboard library.
}

void loop()
{
  RC(); // Run the state machine.

  if (byteIndex == 3) // This indicates we're about to read the 25th Bit so must already have 24.
  {
    // we have our data packet, process it.
    processData();
  }

  delayMicroseconds(100); // We want this to run every 100 uSec so wait here.
}

// Called when a transition of the input or timeout of some kind is detected.
// Resets data buffer if starting a new packet read.
// Resets the counter so we know how long we've been in current state.
void setState (state s)
{
  count = 0;
  if (s == preambleLo)
  {
    bitmask = 0x80;
    byteIndex = 0;
    data[0] = 0;
    data[1] = 0;
    data[2] = 0;
  }

  RCState = s;
}

// Main RC state machine.
// Calls subroutine for the current state.
// Increments count so we know how long we've been in the current state.
void RC()
{
  if (count < 250) // Max count is 250 to avoid wrapping issues.
  {
    count++;
  }

  switch (RCState)
  {
    case preambleHi:
      preambleHiHandler();
    break;
    case preambleLo:
      preambleLoHandler();
    break;
    case subHi:
      subHiHandler();
    break;
    case subLo:
      subLoHandler();
    break;
  }
}

// Nothing to do except wait for the low preamble signal.
void preambleHiHandler()
{
  if (!digitalRead(RCPin))
  {
    setState(preambleLo);
  }
}

// Do nothing if RC pin is low
// If Hi, check how long the preamble low was and either start reading data or wait for preamble again.
void preambleLoHandler()
{
  if (digitalRead(RCPin))
  {
    if (count < 12)
      setState(preambleHi);
    else
      setState(subHi);
  }
}

// If high for too long, abort this packet.
// If pin goes low sotre the bit value depending on how long it was high.
void subHiHandler()
{
  if (count > 12)
  {
    setState(preambleHi);
  }

  if (!digitalRead(RCPin))
  {
    setBit(count > 6);
    setState(subLo);
  }
}

// If low for too long, abort.
// Otherwise just wait for the next high.
void subLoHandler()
{
  if (count > 12)
  {
    setState(preambleLo);
  }

  if (digitalRead(RCPin))
  {
    setState(subHi);
  }
}

// Store the bit in the buffer and move index / pointer to next bit
void setBit(bool bit)
{
  if (bit)
  {
    data[byteIndex] = data[byteIndex] | bitmask;
  }

  bitmask = bitmask >> 1;
  if (!bitmask)
  {
    byteIndex ++;
    bitmask = 0x80;
  }
}

// Check the data against known values and call appropriate function.
void processData()
{
  if (data[0] == 0xff && data[1] == 0x5b)
  {
    // lightning button
    if (data[2] == 0x07)
    {
      lightning();
      delay(1000);
    }

    // lock button
    if (data[2] == 0x03)
    {
      lock();
      delay(1000);
    }

    // unlock button
    if (data[2] == 0x05)
    {
      unlock();
      delay(1000);
    }

    // bell button
    if (data[2] == 0x06)
    {
      bell();
      delay(1000);
    }
  }

  // Get ready to read next packet.
  setState (preambleLo);
}

// Types Password1!
void lightning()
{
  Keyboard.press(0x81);

  Keyboard.press('p');
  Keyboard.release('p');

  Keyboard.release(0x81);

  Keyboard.press('a');
  Keyboard.release('a');

  Keyboard.press('s');
  Keyboard.release('s');

  Keyboard.press('s');
  Keyboard.release('s');

  Keyboard.press('w');
  Keyboard.release('w');

  Keyboard.press('o');
  Keyboard.release('o');

  Keyboard.press('r');
  Keyboard.release('r');

  Keyboard.press('d');
  Keyboard.release('d');

  Keyboard.press('1');
  Keyboard.release('1');

  Keyboard.press(0x81);

  Keyboard.press('1');
  Keyboard.release('1');

  Keyboard.release(0x81);
}

// Windows key L to lock PC
void lock()
{
  Keyboard.press(0x83);  // The windows key code.

  Keyboard.press('l');
  Keyboard.release('l');

  Keyboard.release(0x83);
}

// Types Password2!
void unlock()
{
  Keyboard.press(0x81); // The shift key code.

  Keyboard.press('p');
  Keyboard.release('p');

  Keyboard.release(0x81);

  Keyboard.press('a');
  Keyboard.release('a');

  Keyboard.press('s');
  Keyboard.release('s');

  Keyboard.press('s');
  Keyboard.release('s');

  Keyboard.press('w');
  Keyboard.release('w');

  Keyboard.press('o');
  Keyboard.release('o');

  Keyboard.press('r');
  Keyboard.release('r');

  Keyboard.press('d');
  Keyboard.release('d');

  Keyboard.press('2');
  Keyboard.release('2');

  Keyboard.press(0x81);

  Keyboard.press('1');
  Keyboard.release('1');

  Keyboard.release(0x81);
}

// Types Password3!
void bell()
{
  Keyboard.press(0x81);

  Keyboard.press('p');
  Keyboard.release('p');

  Keyboard.release(0x81);

  Keyboard.press('a');
  Keyboard.release('a');

  Keyboard.press('s');
  Keyboard.release('s');

  Keyboard.press('s');
  Keyboard.release('s');

  Keyboard.press('w');
  Keyboard.release('w');

  Keyboard.press('o');
  Keyboard.release('o');

  Keyboard.press('r');
  Keyboard.release('r');

  Keyboard.press('d');
  Keyboard.release('d');

  Keyboard.press('3');
  Keyboard.release('3');

  Keyboard.press(0x81);

  Keyboard.press('1');
  Keyboard.release('1');

  Keyboard.release(0x81);
}
The next time I have to change my password, I’ll have to edit my code and re-program my little receiver box. That’s a small price to pay for the convenience.